Recipes
This page is a companion to the Resources page.
Python Recipes
Install PyGame
Linux:
$ apt-get build-dep python-pygame
$ apt-get install mercurial python-dev python-numpy ffmpeg libsdl-image1.2-dev libsdl-mixer1.2-dev libsdl-ttf2.0-dev libsmpeg-dev libsdl1.2-dev libportmidi-dev libswscale-dev libavformat-dev libavcodec-dev
$ pip install pygame
Fix “NameError: name ‘math’ is not defined”
Fix “NameError: name ‘math’ is not defined” (or another module):
import math
Fix “RecursionError: maximum recursion depth exceeded”
Your recursive function is either missing a base case, or is somehow not executing it (for example, it is calling itself with the same arguments that it was called with – TBD illustrated in the Recursion notes).
Using doctest
Run all the doctests in a module (file, script): doctest.testmod()
Run the doctests with verbose output: doctest.testmod(verbose=True)
Test a single function: doctest.run_docstring_examples(get_complement, globals())
Test a single function with verbose output: doctest.run_docstring_examples(get_complement, globals(), verbose=True)
Working with Turtles
import turtle

t = turtle.Turtle()
# …
turtle.mainloop()
Re-run program when file changes
- Install nodejs
npm install onchange- Run your program e.g.
onchange '*.py' -- python script.py
Previous semester have also used entr and pytest-watch for this. I also tried when-changed.
Pygame recipes
Set window position
os.environ['SDL_VIDEO_WINDOW_POS'] = "0,0"
Atom Recipes
Enable autosave
Enable autosave, to avoid ever seeing the workflow bug that the code you’re running or committing doesn’t include your latest change(s):
- Select Atom Preferences (cmd+,)
- Click “Packages”
- Find the “autosave” package
- Click “Settings”
- Enable “Enabled”
Use multiple cursors
Use multiple cursors and selections to edit several places at once.
Make Hydrogen work with Anaconda
Make the Hydrogen plugin work with Anaconda Python:
- The easy way: always launch atom by running
atomin the Anaconda Command Prompt.
Git Recipes
Working with Reading Journals
This material is now on the Reading Journal page.
.gitignore: Ignoring Files
Get stuff from my computer to GitHub
$ git add <filename>
$ git commit -m "<commit-message>"
$ git push
You can alternatively use git commit -am '<commit-message>' to both add all
of the files in your folder and put a message on them, all in one command!
If you forget to include -m in your commit, git will open a text-editor called
vim so that you can enter a commit message there. To write your commit message
in vim, first press “i”, then write your message, then type :wq for write-
quit. Alternatively, if you just want to escape from vim’s interface without
saving a message, just enter “:q” for quit.
Pull changes from GitHub
$ git pull
-or-
$ git pull origin master
If you get merging errors telling you that you need to merge or ‘stash’ before you can pull, see the ‘stashing’ section below. Also, a quick note on pulling, what pulling means is that you’re taking the code that others have pushed to your repository and matching what you have on your computer with that, so it incorporates their changes.
Change git commit message editor
Every git commit has a message attached, and you can read these in the history (run git log, q to quit. Try also git whatchanged).
You can optionally provide that message when you commit by using the -m flag. This is fine for short messages, but clumsy as we begin to write longer and more detailed messages.
If you don’t use the -m flag, git will launch a text editor with a temporary file to capture the message. After you save this file and close the editor, the commit will proceed (closing the editor without saving will cancel the commit). You may have seen this happen for a merge commit as you pulled in Reading Journal day 2.
By default git uses the nano editor, but you can change it to whatever you want
$ git config --global core.editor your_favorite_editor_goes_here
If you’d like to use Atom to write your commit messages, you should do:
$ git config --global core.editor "atom --wait"
The --wait flag makes it so the commit proceeds after you save the temporary file and close the tab in Atom, as git expects.
How to stash (and what is stashing?)
$ git stash
Stashing stores the copy of your current version of the repository on your computer, so you can keep that copy there before you pull changes that others have made. Often, you’ll be prompted to stash before pulling or merging with others. Now that you’ve stashed, how do you get your stuff back? You’ll probably do the following:
$ git stash
$ git pull
$ git stash pop
Git stash will store your changes locally, git pull will download the changes other have made to the repository, and git stash pop puts the changes that you made locally that conflict directly in the code. If there’s anything to merge, do it in the file and then commit and push your changes.
Fix a Git detached head
$ git checkout master
If this doesn’t work, try:
$ git checkout origin/master
What is branching on Git?
Branches on Git are very similar to branches on trees. The tree trunk is
represented as the master branch and the branches that come off of the
master branch you can name whatever you want. These branches will start at
whatever state master was at the time you made the branch. The master branch
can continue changing independently of the branch that you created. You can
combine the changes that you make in separate branches by ‘merging’ them
together. For more on merging, look at the sections that will follow. Also,
you can view all of the branches in your repository by doing:
$ git branch -a
And you can tell what branch you’re on by doing the command:
$ git branch
Make a new branch
$ git fetch origin
$ git checkout -b <your-branch-name> origin/master
This branch will exist on your computer, in order to push it to git and have it be visible by others, you’ll have to push your local branch to be a remote branch (see below)
Push your local branch to be a remote branch
$ git push -u origin <your-branch-name>
Check out a branch
‘Checking out’ a branch is when you pull another person’s branch (or teleport to another branch), you do it by doing:
$ git fetch origin
$ git checkout <branch-name>
Resolve merge conflicts
See Resolving a Merge Conflict Using the Command Line on GitHub.
Merge one branch into another
Let’s say that you’ve been working on a branch called dev and you have also
been modifying the master branch. You want to merge your changes in the
master branch into the dev branch, so that your dev branch is up to
date. What you want to do is first get into the dev branch, then:
$ git fetch origin
$ git merge origin/master
If you have any conflicts, deal with them, commit and push your changes, and you’re good to go!
Download a single file directly from GitHub
99% of the time you will be using Git as intended (as described above) and working on files in a repository you’ve cloned to your local machine. However, on rare occasions it is useful to grab a single file from GitHub, without cloning the repo it is part of.
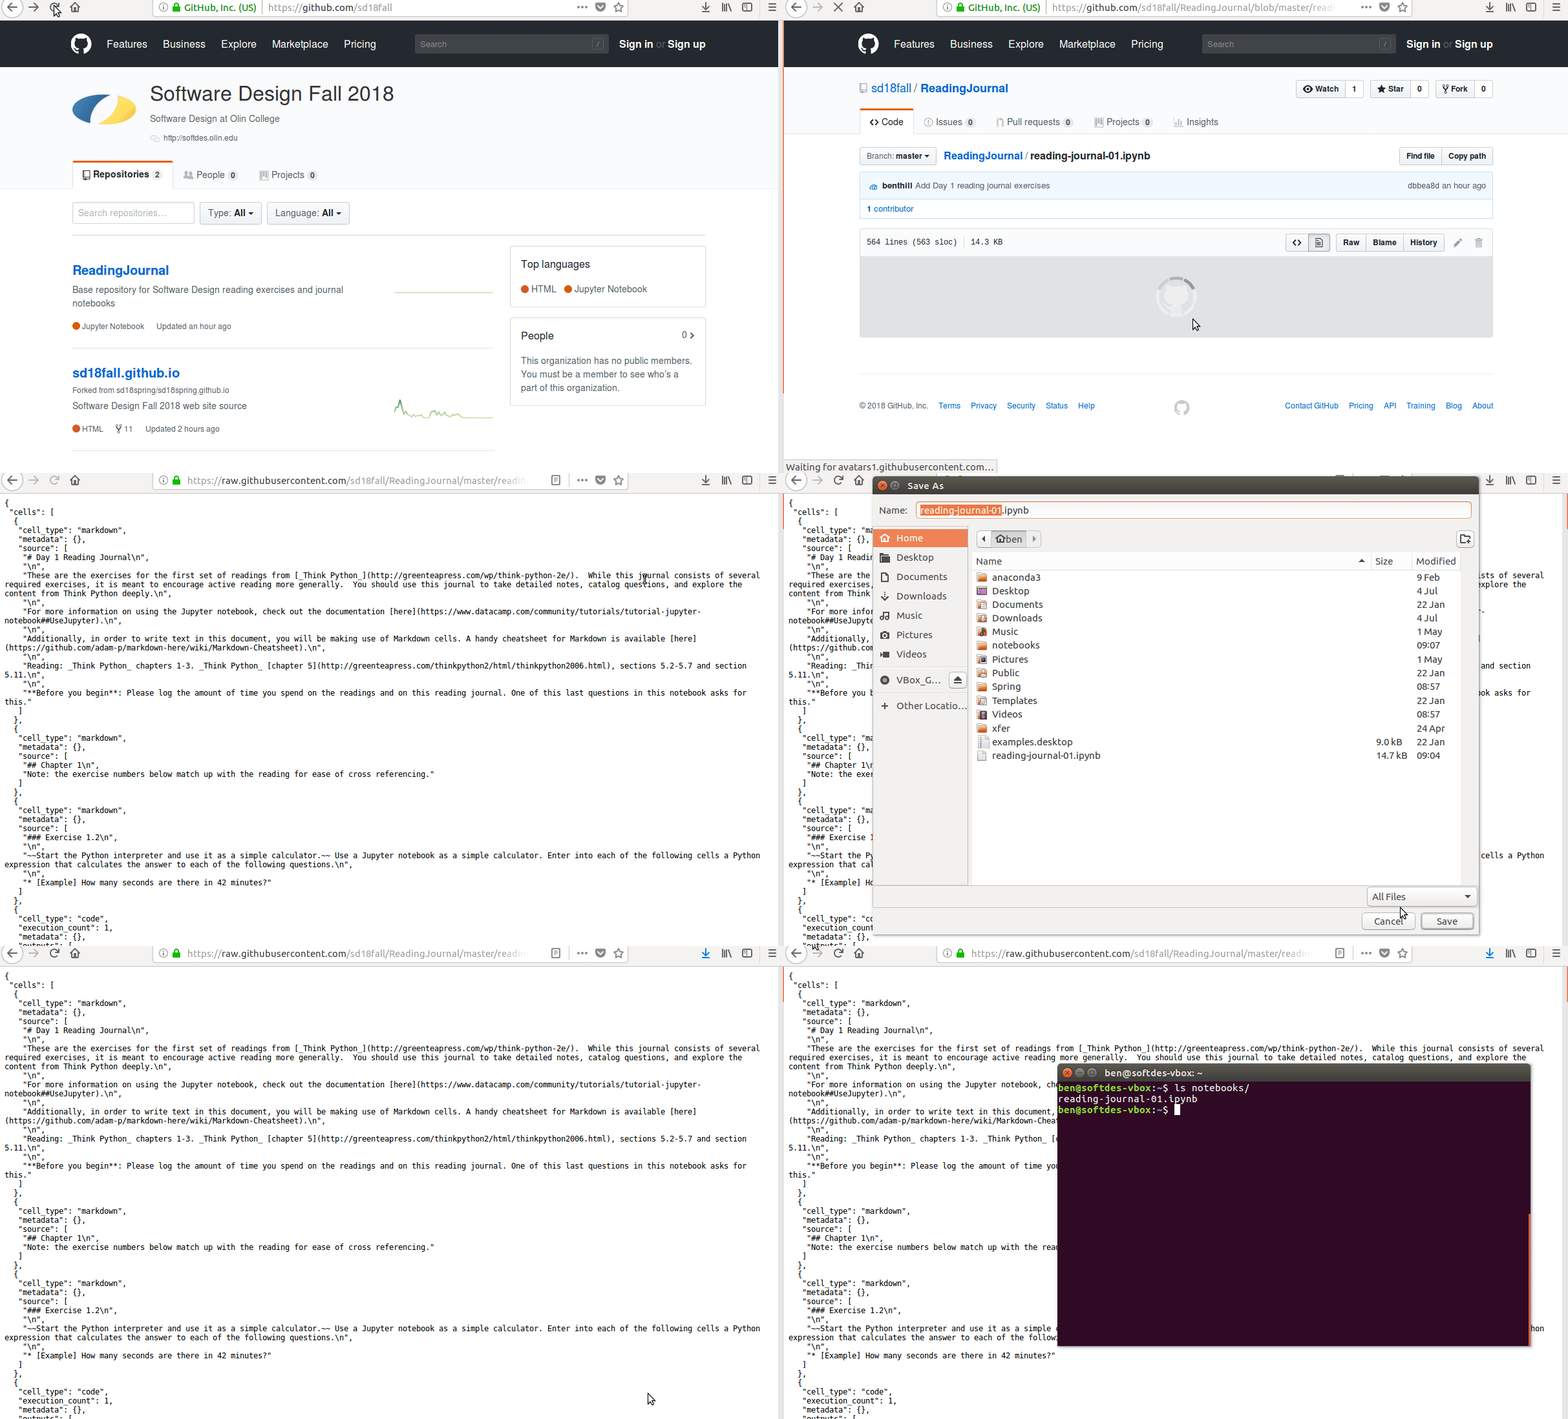
To accomplish this, navigate to the file you want on the GitHub web interface, click “Raw”, then use “Save as…” in your browser (being sure to select “All files” as the file type so the browser doesn’t unhelpfully insert a “.txt” extension).

Link to a section of code in GitHub
- Go to your project repository on GitHub.
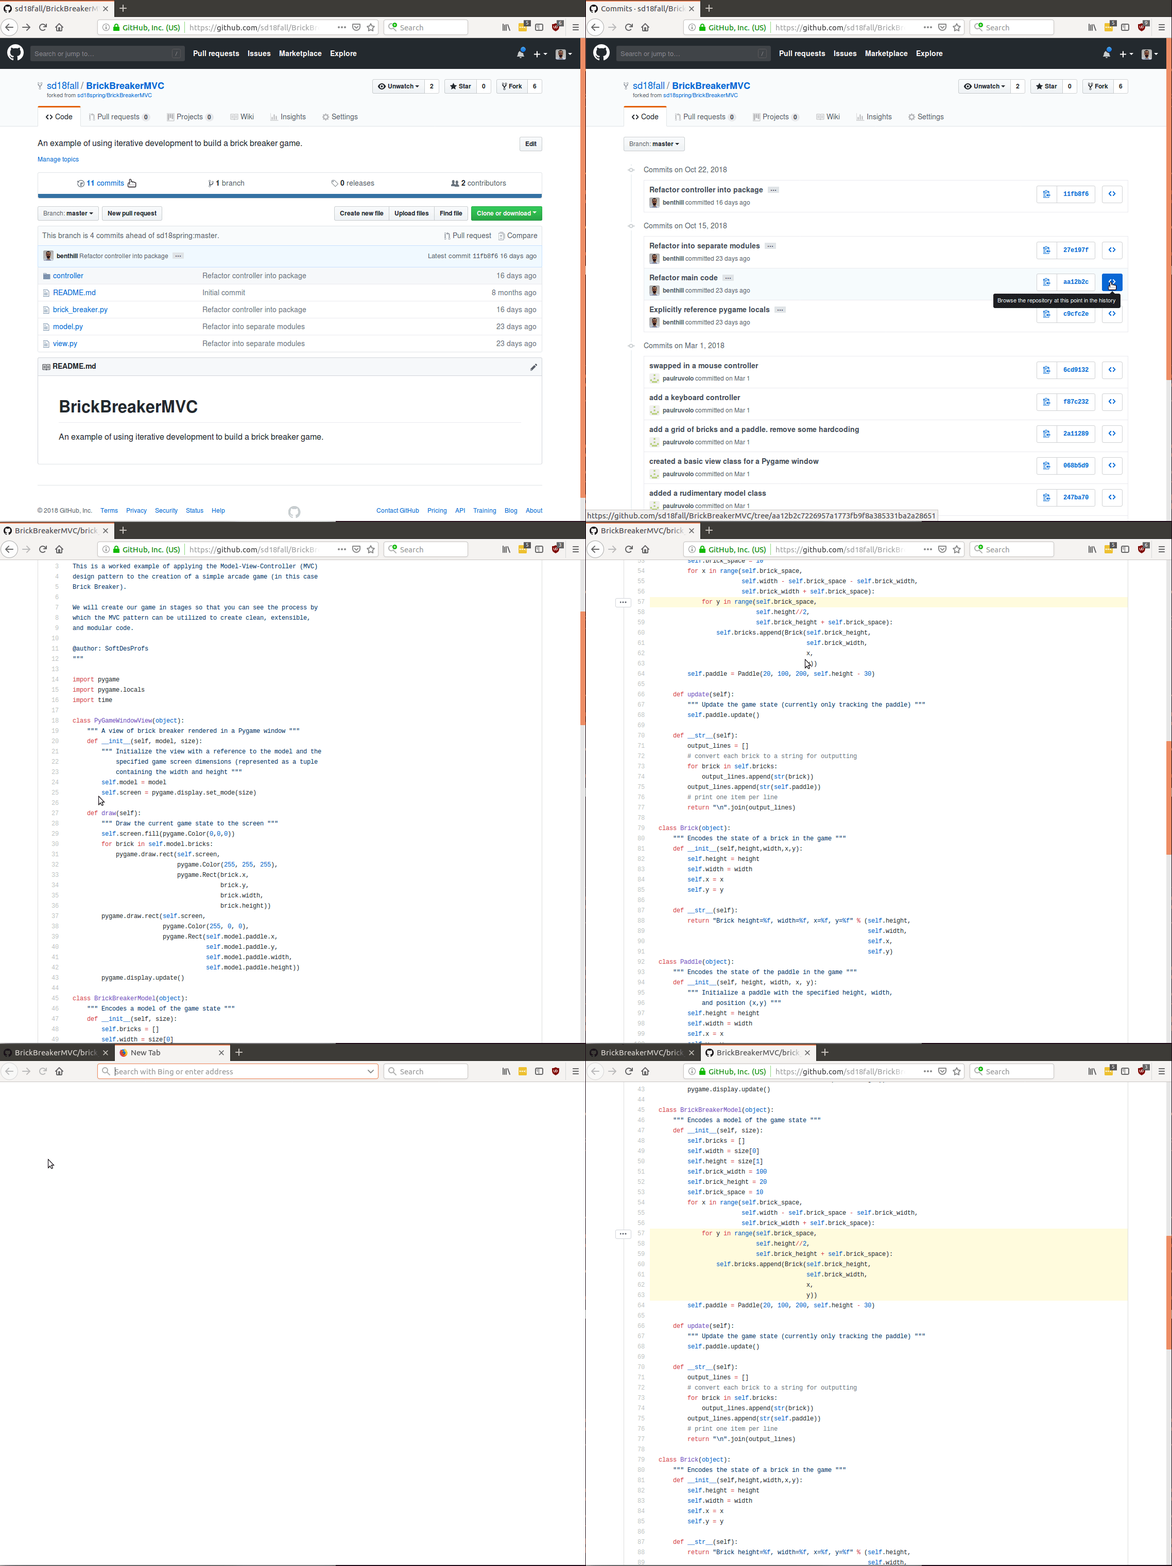
- [Optional] If you want to link to code in a previous commit, click on “[N] commits” in the upper left to see your history. Find the commit representing the point in time you’d like to link to and click the “<> - Browse the repository at this point in the history” button on the right.
- Navigate to the file containing the code to link.
- Scroll down to the line number starting the section of code to link to and click the line number. You should see the line highlighted in yellow.
- Hold the shift key and click the line number for the end of the section of code to link to.
- In the ellipsis (“…”) menu, select “Copy permalink”. This should give you a URL ending with an HTML anchor (e.g.
#L57-L63) referring to the line numbers of the selected section.
