Web Apps
Introduction
Flask is a lightweight and powerful web framework for Python. It’s easy to learn and simple to use, allowing you to build your web app in a short amount of time.
In this toolbox, you’ll learn how to build a simple website, containing two static pages with a small amount of dynamic content. While Flask can be used for building complex, database-driven websites, starting with mostly static pages will be useful to introduce a workflow, which you can then generalize to make more complex pages in the future. Upon completion, you’ll be able to use this sequence of steps to jump-start your next Flask app.
Get Set
In this toolbox, you’ll be learning Flask. To do this, you’ll first need to install Flask. Run the following command:
$ pip install Flask
This toolbox exercise was developed by Patrick Huston and Anna Griffin.
What is Flask, really?
In the introduction, we defined Flask as a “web framework”, but what does that actually mean? Let’s dig deeper. Before this, let’s develop a better understanding of how the Internet works.
When you open up a web page in your browser (e.g. Chrome, Firefox, etc.), it
makes an HTTP request to a server somewhere in the world. This could be
something like GET me the home page. This server handles this request,
sending back data (this can be in the form of HTML, JSON, XML, etc.), which is
rendered by your browser.
For more on how the Internet works check out this article and video
This is where Flask comes in - it allows you to create the logic to make a web
server quickly in Python. You can write logic that will execute when a request
is made for one of your routes (e.g. www.mycoolwebsite.com/home)
Hello World in Flask
Let’s write some Flask. In the starter code, there is a file named hello.py which is a very simple Hello World application written in Flask:
from flask import Flask
app = Flask(__name__)

@app.route('/')
def hello_world():
    return 'Hello World!'

if __name__ == '__main__':
    app.run()
Run hello.py in the terminal.
$ python hello.py
 * Running on http://127.0.0.1:5000/
Now head over to http://127.0.0.1:5000/, and you should see your hello world greeting. </p>
In case you’re curious 127.0.0.1 points to your local computer, and 5000
is the port it’s listening on.
What did that actually do? Let’s walk through the steps.
- First we imported the Flask class.
- Next we create an instance of this class. The first argument is the name of the application’s module or package. If you are using a single module (as in this example), you should use
__name__because depending on if it’s started as application or imported as module the name will be different (‘__main__'versus the actual import name). This is needed so that Flask knows where to look for templates, static files, and so on. - We then use the
route()decorator to tell Flask what URL should trigger our function. In this case our route is/, commonly referred to as theindexof a page. This is the homepage of your website. - The function is given a name which is also used to generate URLs for that particular function, and returns the message we want to display in the user’s browser.
- Finally we use the
run()function to run the local server with our application. Theif __name__== '__main__'makes sure the server only runs if the script is executed directly from the Python interpreter and not used as an imported module.
To stop the server, hit ctrl+c.
What’s this routing business?
In our hello world, example, we had one route denoted by the decorator
@app.route('/'). Again, this ‘decorator’ tells the Flask app that any
incoming requests for GET / will run the function we called
index().
Edit your hello.py file so that it looks like the example below. The new block of code adds an another page. Now the @app.route('/hello') ‘decorator’ tells the app to run hello() when we get incoming requests for GET /hello
from flask import Flask
app = Flask(__name__)

@app.route('/')
def index():
    return 'Index Page'

@app.route('/hello')
def hello():
    return 'Hello World'

if __name__ == '__main__':
    app.run()
In this example, if you now navigate to http://127.0.0.1:5000 you should see “Index Page” and if you then visit http://127.0.0.1:5000/hello, you should see “Hello World” returned since the '/hello' route was defined to do so.
Pretty simple, right? What happens when we want to do something useful - e.g. display something other than text?
Let’s serve some HTML!
HTML (HyperText Markup Language) is the standard markup language used to create web pages. In addition to sending back strings, Flask can send back HTML files to the client, which will be rendered in the browser. Let’s get to work creating a basic HTML document.
If you are new to HTML or if you need a refresher, this website is very helpful and provides many examples.
Let’s start by creating a new directory called templates and creating a new file within it called index.html along with the following code..
<!DOCTYPE html>
<html>
    <head>
        <title>
            A Small Hello
        </title>
    </head>
<body>
    <h1>Hi</h1>
    <p>This is very minimal "hello world" HTML document.</p>
</body>
</html>
Now let’s serve this HTML page. This can be done with the render_template() method that is provided by flask. At the top of hello.py make sure you add render_template to the import statement so it looks like the updated one below. Let’s modify our '/hello' route to return our HTML:
from flask import Flask, render_template

@app.route('/hello')
def hello():
    return render_template('index.html')
Run hello.py once again and go to http://127.0.0.1:5000/hello. What appears on the page should resemble the html you just added.
To stop the server, hit ctrl+c.
Rendering Pages with Variables
Rendering pages that have everything hardcoded is not ideal in most situations, because a dynamic web application will want to do some sort of computation with data before returning it to users. Let’s figure out how to pass variables to our HTML pages!
All you have to do is provide the name of the template and the variables you want to pass to the template engine as keyword arguments. Here’s a simple example of how to render a template:
from flask import Flask, render_template

@app.route('/')
def index():
    return 'Index Page'

@app.route('/hello/<name>')
def helloTemplate(name=None):
    return render_template('hello.html', name=name)
Then change hello.html so that it renders with the name that gets passed through.
<!doctype html>
<title>Hello from Flask</title>
{% if name %}
  <h1>Hello {{ name }}!</h1>
{% else %}
  <h1>Hello, World!</h1>
{% endif %}
And that’s it! Again, following the instructions
$ python hello.py
 * Running on http://127.0.0.1:5000/
You can access the templated page by going to http://127.0.0.1:5000/hello/
Build your own app: getting input from the user
What use is a web application if you can’t get any data back from the user? Let’s set up a simple app. Here are our end specifications:
Start creating your app in the flask_app.py file in the starter code
- Upon visiting the index page at http://127.0.0.1:5000/, the user will be greeted by a page that says hello, and includes an input form that requests their name, age, and favorite SoftDes Ninja.
- Upon clicking the ‘Submit’ button, the data from the form will be sent via a POST request to the Flask backend at the route
POST /login. - The Flask backend will handle the request to
POST /loginand perform some simple validation on the user input - simply check to see if they exist. - If all the information is present, the app will render a page for the user - presenting their name and age. Regardless of their input for final question, and regardless of whether Patrick is a SofDes Ninja, the app will display
Patrick Huston - If all the information is not present, the app will render a simple error page, which will include some indication that they didn’t include all the required information, in addition to a button that will redirect the user back to the home page.
It will be up to you to make this happen. If you feel confident in your ability to implement this, go for it! If you’d like more scaffolding, continue reading.
Suggestions
If you’re feeling a little lost, that’s perfectly okay! Let’s start by making files for all of the pages we need. In the templates folder create the following files:
questions.html
response.html
error.html
Questions
questions.html should be the first page the user see when they run flask_app.py. This page should have a text field for the user’s name, age, and favorite NINJA as well as a submit button. To do this, you will need to create an HTML form.
If you are unfamiliar with forms, check out here and here for examples
Response
response.html should display the information the user entered. This is where the rendering pages with variables section will come in handy. This means that you have to understand sending data from the HTML form as well as actions and methods in order to create a functioning submit button.
For information about sending data, actions, and methods, check out here and here for further explanations
In order to render the information from the form, you need a way to access the form data. In order to access the inputs, you must use the request object which you can read about here.
from flask import Flask, render_template, request
You can access the form data by the name you assigned each input in the form html. In this example, we used the name username to identify the data entered in the text field.
response.html
<input type="text" name='username' />
flask_app.py
request.form['username']
Error
This page should rendered a message that informs the user why they are getting this error and provide a button that directions them back to the questions page so they can try again.
If your button isn’t redirecting, try creating a form on the error page with a submit button that reroutes to the questions page. This way an action can be performed when the button is clicked.
Words of Wisdom
If you are still feeling stuck, the official Flask documentation is also very helpful and provides additional information about the topics introduced in this toolbox. HERE.
This guide is also a good resource. It provides many examples that are easy to understand and can be applied to your app.
There are also many more resources available to you which you are encouraged to take advantage of. We understand that a lot of the topics and concepts in this toolbox will be new to most of you. Web apps are a great tool to have in your toolbox for future projects and it is quite alright to still be confused. Don’t hesitate to reach out for help from NINJAs and instructors. Good Luck!
What to turn in
Push the web app you developed in the previous section to GitHub.
Going further
- Learn more about Django – an alternative to Flask. They don’t have many major differences other than some small quirks in conventions and style. See here for more analysis.
- Want to keep track of some data in your web app? Instead of using a .txt file or a pickle file, it’s common practice in nearly any web app to use a database. A few especially well-known database choices are MySql, SQLite, or PostgreSQL (which all use Structured Query Language to manipulate stored data, as do many other common relational databases) You also may have heard some buzz about MongoDB, which uses an unstructured data format in
documentssimilar to JSON. Mongo is stupidly easy to set up and use, but I’d stop and think first before jumping right in. It may be the easy choice, but representing your data intelligently in a relational table can be much more effective and less of a headache later on. - But HTML is so ugly! HTML alone is very ugly. That’s why we use CSS (Cascading Style Sheets) to add some extra flair and style to our HTML. You can change pretty much anything about HTML - colors, shapes, sizes, placement, etc. with CSS rules. It’s also pretty simple to write. Check this resource out to learn more about CSS.
- What about making my website dynamic? SoftDes may be a class in Python, but we can venture out a little and use some jQuery. jQuery might seem scary, but you use it in a way similar to adding/linking CSS styling to your HTML. You write scripts in JavaScript (which isn’t too difficult), which can allow you to add beautiful responsive and dynamic content to your web app. You can also use a Javascript frontend framework like React or Redux to do advanced state based pages. It’s pretty cool, but quite advanced!
- You can also use D3 to display graphical data in a web page.
(Optional) Going Beyond - Web Deployment
One thing you can do once completing this toolbox is deploy your Flask application to the cloud, so that users can visit it at a public URL. This is especially useful if you end up using Flask in your final project - in past years, teams have used it to make their projects publicly accessible on the Web!
You will learn how to use git push to deploy to the Heroku hosting service, how to configure a Flask application to accept external requests, and how and why to configure a Flask application to listen on different TCP/IP ports.
Get Set
-
Follow the instructions here to sign up for a (free) account Heroku cloud platform. Heroku manages servers that will run your app.
-
Follow the instructions here to download the Heroku command-line interface.
-
Run
heroku loginwith the credentials you created in step 1:Enter your Heroku credentials. Email: youremail@olin.edu Password (typing will be hidden):
Create a Heroku application
Run heroku apps:create to create a Heroku application:
$ heroku apps:create web-app
Creating app... done, boiling-brushlands-71788
https://boiling-brushlands-71788.herokuapp.com/ | https://git.heroku.com/boiling-brushlands-71788.git
heroku apps:create selects a random name (above, boiling-brushlands-71788)
for your application. You can also specify a name, so long as it is unique among all Heroku applications (for all users).
For example, heroku app:create softdes-toolbox makes my application available at https://softdes-toolbox.herokuapp.com.
Publish Your Application to Heroku
$ cd /path/to/web-app
$ heroku git:remote -a my-heroku-app-name
$ git push heroku master
where my-heroku-app-name is the name of your Heroku application.
You should see an error message:
Total 0 (delta 0), reused 0 (delta 0)
remote: Compressing source files... done.
remote: Building source:
remote:
remote: -----> Failed to detect set buildpack https://codon-buildpacks.s3.amazonaws.com/buildpacks/heroku/python.tgz
remote: More info: https://devcenter.heroku.com/articles/buildpacks#detection-failure
remote:
remote:  !     Push failed
remote: Verifying deploy....
remote:
remote: !  Push rejected to my-heroku-app-name.
remote:
To https://git.heroku.com/my-heroku-app-name.git
! [remote rejected] 7039fff -> master (pre-receive hook declined)
error: failed to push some refs to 'https://git.heroku.com/my-heroku-app-name.git'
Why Doesn’t it Work (pt. 1 of 2)? – Setting Your Repo Up for Heroku
If you Google around and spend some time learning what a “buildpack” is (not required for this toolbox), you will eventually learn that Heroku can’t figure out what programming language your application is written in, and therefore doesn’t know how to run it.
You need to add three files to your repository in order to tell Heroku how to provision a server:
requirements.txt- is a list of Python packages. This tells Heroku that your application is a Python program, and which packages to install.
Procfile- lists the command and arguments that starts your program.
runtime.txt- specifies the Python version. Without this file, Heroku will use Python 2.7. The toolboxes use Python 3, so it is necessary to override this.
Here’s what to do:
-
Create the following three files, with these contents:
Procfileweb: python3 hello.pyruntime.txtpython-3.7.2requirements.txtFlask -
Use
git addto add the new files to the repository.git committhem. -
Test the
Procfileon your laptop:$ heroku local webRunning
heroku localhas the same effect as runningpython3 hello.py, but it uses the sameProcfilethat Heroku will use. Running thereforeheroku localtests more of what will happen “in production” than runningpython3 hello.pydoes. (See The Twelve-Factor App: Dev/prod parity. -
Now
git push heroku masteragain. This time the deploy should succeed:$ git push heroku master […] remote: -----> Launching... remote: Released v18 remote: https://my-heroku-app-name.com/ deployed to Heroku remote: Verifying deploy.... done. To https://git.heroku.com/my-heroku-app-name.git
Open Your App in a Browser
Do you do this in one two ways:
-
Find the line
https://my-heroku-app-name.herokuapp.com/ deployed to Herokuin thegit pushoutput above. Openhttps://my-heroku-app-name.herokuapp.com/in a browser. Or: -
heroku apps:opendoes this automatically.
You should see an “Application Error” page.
Why Doesn’t it Work (pt. 2 of 2)? Configuring Your Server to Accept Remote Connections
By default, your application only accepts HTTP requests from the same machine.
This is because it uses 127.0.0.1 as the host.
This is appropriate for local development, but does not make for a web server in the cloud. You need to run your application with 0.0.0.0 as the host. This allows it to accept requests from anywhere on the web.
A second issue is that your application currently accepts connections to TCP/IP port #5000.
From the outside, Heroku accepts HTTPS connections to port #443. This is the default port for an https: URL, and is why you (eventually) will get to use https://my-heroku-app-name.herokuapp.com/, instead of https://my-heroku-app-name.herokuapp.com:5000/.
Internally, Heroku expects your app to accept an HTTP connection on some port that depends on your application, maybe where it’s running, and maybe the time of day – you don’t know what the port number is when you write your code. Heroku communicates the port number to your application by setting an environment variable.
Fix these two problems (using 0.0.0.0, and reading the port number from an environment variable) as follows:
-
Add this line to the top of your file:
import os -
Define
HOSTandPORTas below. Then addhostandportarguments to theapp.runfunction. Commit the change,git pushto Heroku again, and test again. You should see your web page.HOST = '0.0.0.0' if 'PORT' in os.environ else '127.0.0.1' PORT = int(os.environ.get('PORT', 5000)) app.run(host=HOST, port=PORT)
Whitelist the Domain
Problem: Olin’s DNS provider blocks some new sites from the Olin network after a 1-3 day grace period. Your app may work for a while, and then stop working with the message below:
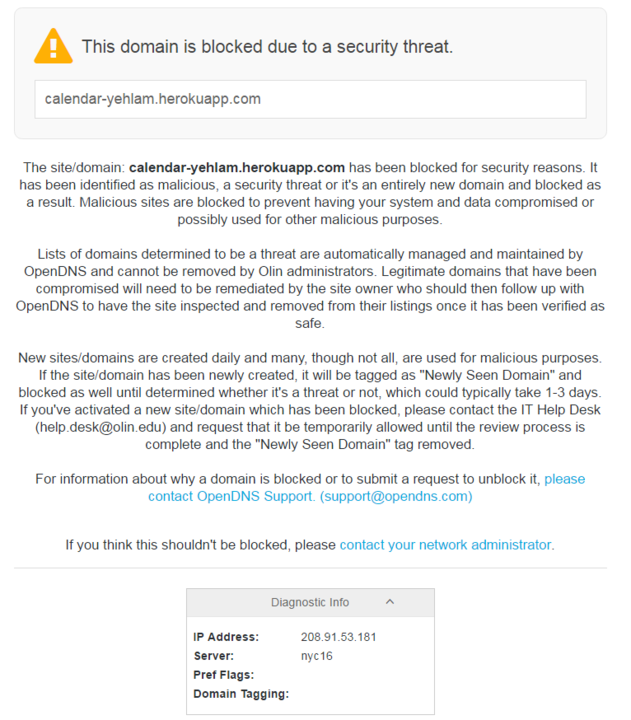
Solution: Send a message to helpdesk@olin.edu: “I am using the domain name myapp.herokuapp.com for a class project, and need access to it from within the Olin network. Please configure DNS so that it does not block this site.”
Even More To Do
Some things you can do to learn more and/or have more fun:
 button. The instructions are